Installation - Fitting Mirror Module
- PLEASE READ PRIOR TO INSTALLATION
- Safety Information
- Unpacking
- Installation - Frame Fitting
- Installation - Fitting Mirror Module
- Installation - Fitting the Trim Ring
- Electrical Operation – Testing`
- Projector Installation
- DT-Actuator-Commander Software
- Mirror Setup
- Bottom Cover Installation
The Mirror Module if fitted the reverse of the method to remove it from the frame on unpacking.
Lift the mirror module up into position
While doing this feed the power cable and any required control cable down through the access hole in the top of the Mirror Module.
Align the top white plastic sliders on the frame to the groove in the aluminium profile on the upright of the mirror module.
Slide the mirror module right up ensuring that the second white plastic slider engages into the groove as you raise the module up.
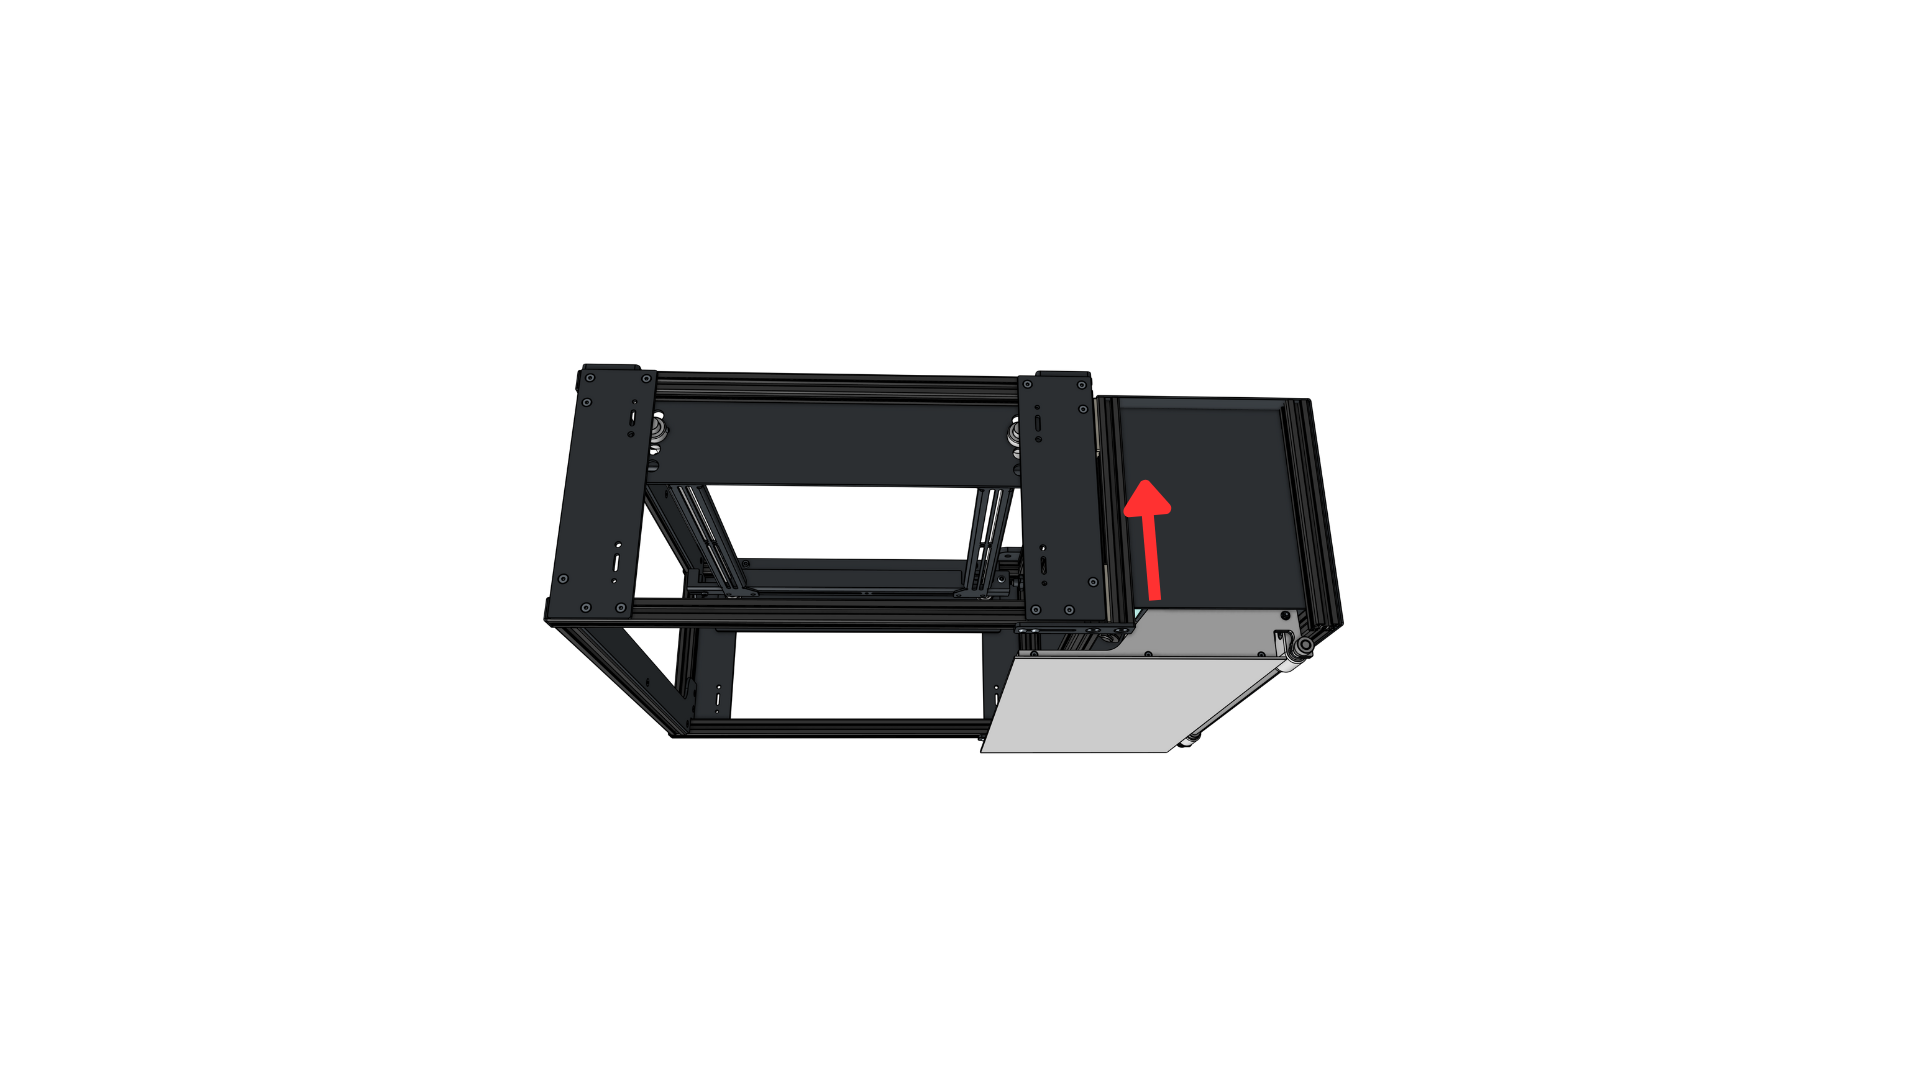
Figure 5 – Mirror Module Location
Slide the joining plate back towards the front of the mount
Bolt into position using two of the M8 black bolts through the joining bar; one into the frame of the mount and one into the frame of the mirror module
Repeat for the joining bar on the other side of the projector
 Figure 6 – Mirror Module Locking Plates