DT-Actuator-Commander Software
- PLEASE READ PRIOR TO INSTALLATION
- Safety Information
- Unpacking
- Installation - Frame Fitting
- Installation - Fitting Mirror Module
- Installation - Fitting the Trim Ring
- Electrical Operation – Testing`
- Projector Installation
- DT-Actuator-Commander Software
- Mirror Setup
- Bottom Cover Installation
📄 This software is required for the manual control and setting of the MMD Products from DT. Please install this software and follow this process for initial operation and setting the stop positions of the Secondary mirror.
Installation
Install the software following the on-screen prompts.
Connection
Connection to the Actuator Commander Control box should be done via USB.
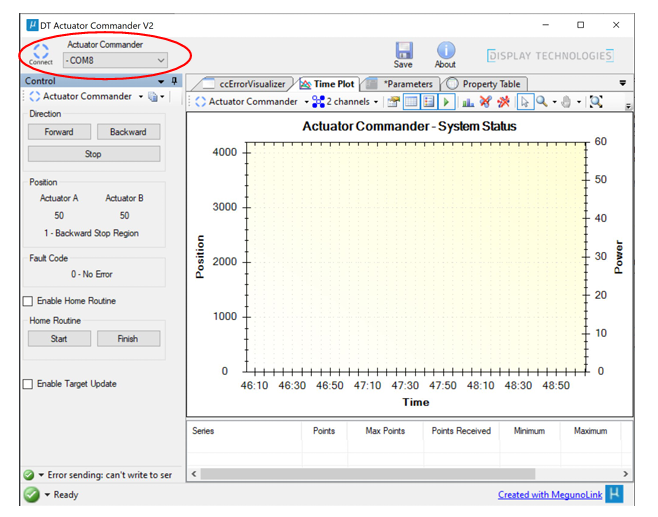
Run the Actuator Commander software
Connect to the commander by selecting the comm port you have the commander connected on from the drop-down list. Then press the connect button.
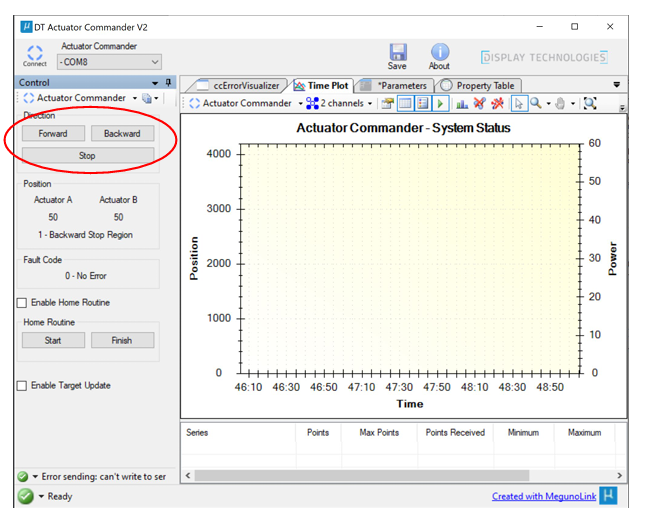
Control of the Actuators can now be done via the control button. (Note care should be taken during this as the stop positions of the actuators are not set for your product yet so only move a short distance to check operation.
If the actuator does not respond to the commands, you will need to initiate a home routine. Check the ‘Enable Home Routine’ box, next press the ‘Start’. Note the actuators will now close to their full extent. Ensure that you do not obstruct any part of the device during this operation.
Wait for 5-10 seconds after homing has finished before testing operation again.
Setting Stops
Stops are set using the Actuator Commander Software.
Ensure that the software is open connected via USB and the device is connected in the software.
Select the ‘Parameters’ Tab
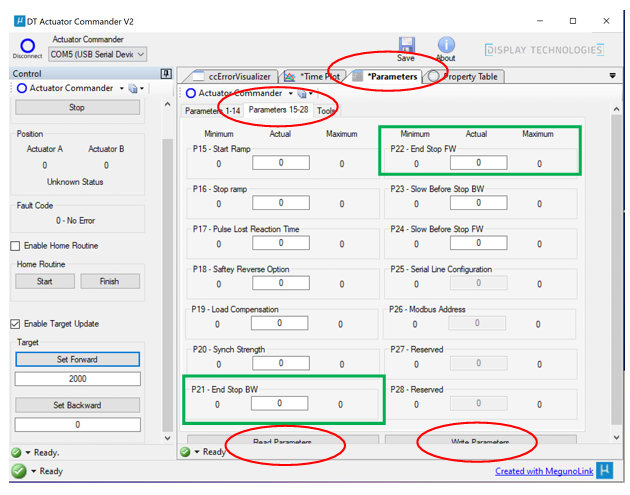
Scroll down and press the Read Parameters
You will now see numbers in the P21-End Stop BW and P22-End Stop FW.
To change the position of the close (actuator in) increase or decrease the P21-End Stop BW figure. Then press the Write Parameters button to commit the changes.
To change the position of the Open (actuator Out) increase or decrease the P22-End Stop FW figure. Then press the Write Parameters button to commit the changes.
Test operation and adjust as necessary
⚠️ Do not change any other parameters unless specifically told to do so by Display Technologies Ltd Technical Support